Editing Specifications
⚠️ Editor Role Required
Only users with the Documentation Editor role may edit DRAFT or ACTIVE specifications. Remember that FINAL specifications are frozen by design.
Think you should be an editor, but can’t access it? Ask an admin to check the Issuer-level controls.
Overview
When you open a specification, it starts in read-only mode. To start making changes, toggle the icon in the left-hand sidebar.
Adding Sections (Pages)
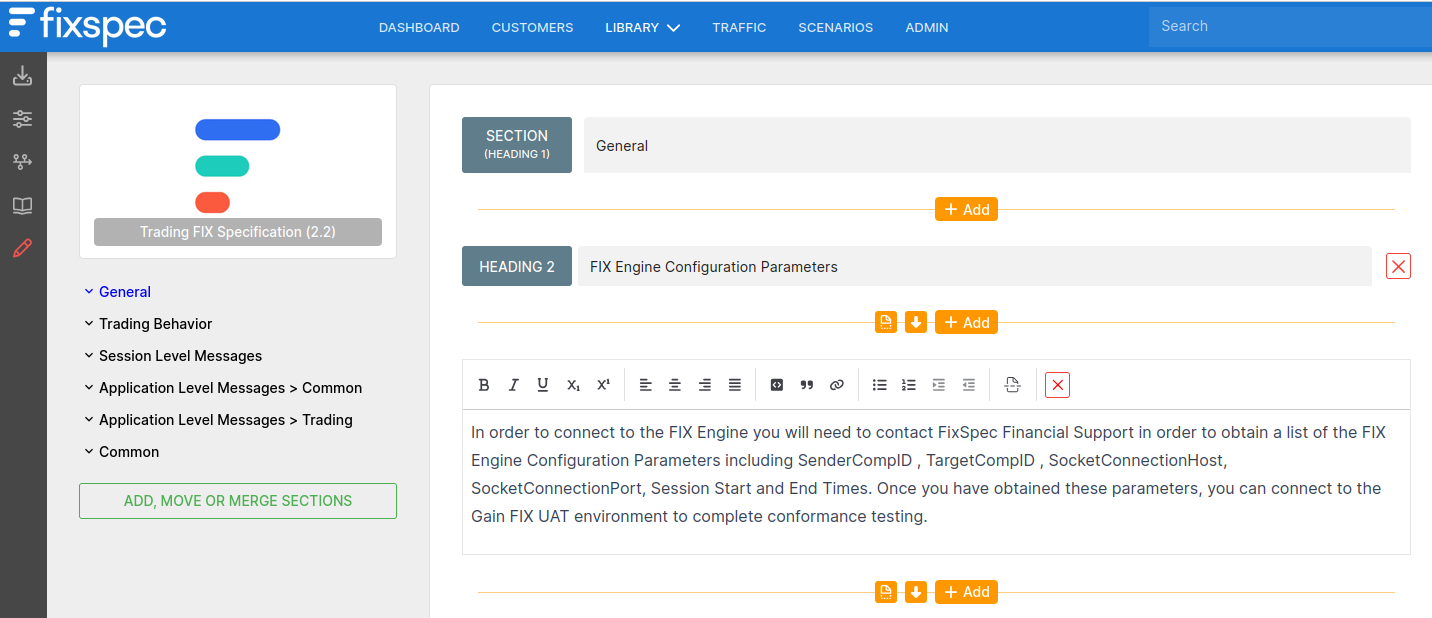
A Section refers to a high-level chapter within a specification, which is presented as a single (potentially) long page. We reserve the H1 heading for their title, and this will always appear as the first content block at the top of the page.
To add a new Section, you can either:
- Click the “Add, Move Or Merge Sections” button in the left-hand menu, or
- Split an existing Section by using the button. If you click this just before an existing heading, that next heading will be promoted to the title of the new section.
Adding a Section will automatically adjust the top-level navigation menu in the left-hand menu.
ℹ️ Sections within PDF
If you have PDF export enabled, then each Section will be preceded by a page break, and the heading will be displayed as normal.
While it is possible to delete empty sections, it is more likely that you would wish to merge two existing sections together. For information on that, see the Merging & Moving Sections below.
Adding Content Blocks
On any given Section (page), we have multiple Blocks, each of which represents a chunk of content within the page. These take the form of:
- A heading (with H1 reserved for Section titles),
- A block of rich text,
- An image,
- A table,
- A PlantUML sequence diagram, or
- A structured API message (e.g. FIX)
Each Block type has its own user interface elements, most of which are self-explanatory. See Adding Components & Messages for further details of maintaining structured API messages.
ℹ️ Impact of Headings on Navigation
Heading Block levels 2 and 3 are used to automatically create both the expanding left-hand navigation menu for the specification, and the right-hand “On This Page” intra-page navigation. If you have PDF export enabled, then headings up to and including level 4 will be used to derive the Table of Contents.
Merging & Moving Sections
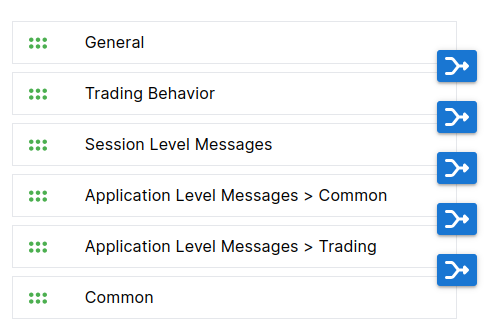
Click the “Add, Move or Merge Sections” button, and use the icon to drag re-order, and the icon to merge sections. Don’t forget to click “Save” when you are done!
💡 Splitting Sections
You can also split an existing Section by using the button.
Adding Components & Messages
When firms need to add a new FIX Component or Message to their API, they inevitably start by importing from the FIX standards — so that’s the approach we’ve followed here too.
- Click the + ADD button where you would like the fieldset to appear, and then choose Fieldset.
- In the wizard that appears, choose Component or Standard Message and search for the fieldset you need.
- Because the later FIX standards have a habit of deeply-nested components, you have the option to “flatten” them if you like. This unwraps them from the Component but (of course) keeps all repeating groups intact.
- Finally, you can choose whether to import just mandatory fields, type a list, or import everything.
- Click SAVE and your fieldset will be added to your specification.
💡 Try Mandatory Only
While we offer it as an option, we recommend NOT importing all fields, as it simply creates a lot of noise that you will spend time removing later. Instead, we recommend importing just the mandatory fields, and then adding any optional fields you need.
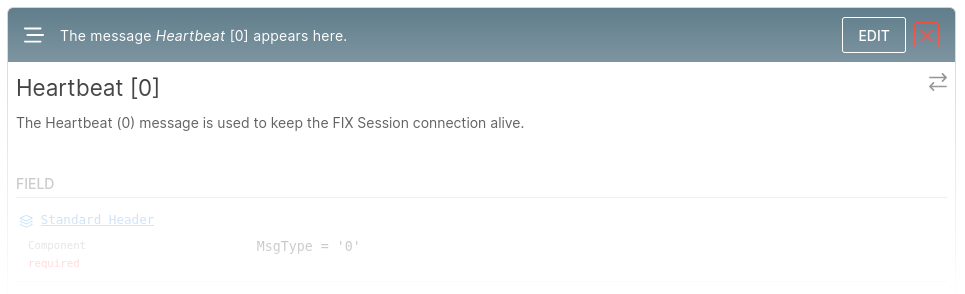
Once you have added your fieldset, it will appear in the stream of content Blocks as an abbreviated panel as below. You can then click to EDIT further.
Adding Fields
- With the page in edit mode (:icon:fa-regular fa-pencil:#ef5350:), find and click to EDIT the fieldset.
- Move to the “FIELDS” tab to list the fields, and scroll to the bottom to find the fast entry box (see below).
- Type the tag numbers or component names and either click + or hit Enter to look them up and append them to your fieldset.

💡 Beware of Component Naming!
Adding fields by number is easy, but FIX has some quirks when looking up Components. Be sure to enter the name exactly as specified by FIX, which typically uses CamelCasing.
When you add a field or Component using this method, the data imported by the platform follows a sequence of resolution rules:
- If the field/Component is already defined in the current specification, then use that definition.
- Else, lookup the field/Component in the Repository. If it exists, use that definition.
- Otherwise, look it up in FIX standards, and use that.
- As a last resort, a field will be marked “custom” and added. Note that Components can not be marked “custom”.
Since it may take a few seconds to iterate through these various options (including querying external sources), adding fields/Components in this way operates as a simple queue; if one entry fails for any reason it will block subsequent entries behind it. This safety feature stops sequencing failures in the event of rapid entry.
Editing Fields
Within the “Fields” tab of a fieldset, a variety of editing controls are available:

- Use the icon to move the row up or down. The Standard Header and Trailer are - of course - fixed.
- The Tag column displays the field tag number or a icon to indicate it is a Component. Tag numbers are only editable for custom fields.
- The Name column shows field or Component name. This can only be edited in the case of custom fields.
- Req’d is a toggle field to switch between mandatory (Y), optional (N) and conditionally-required ©. You are invited to write an expression to describe when a row is conditionally-required.
- Type is the FIX datatype (or blank for components). This becomes a select box for custom fields.
- Use the Description column to provide a rich-text description of the field or Component’s purpose and usage.
- For eligible datatypes, the Values column can be used to provide either a list of enumerations, or to set minimum and/or maximum values.
- Use the icon (where shown) to break out of a repeating group.
- Use the icon to delete the row.
Handling Repeating Groups
Repeating Groups are a unique complexity in FIX fieldsets; they represent a repeating, strictly-sequenced list of fields (or Components) which are preceded by a special field with a NumInGroup datatype indicating how many repetitions are present. In traditional PDF documents, the repeating fields are indented with a particular character such as :icon:fa-regular fa-arrow-right:. Add in the fact that repeating groups can be nested, and you quickly end up with an error-prone documentation process.
To assist with managing this complexity, the platform automates much of the repeating group logic:
- When adding a NumInGroup field, we automatically indent subsequent fields that should be part of the group (per FIX standards), and outdent again when we reach the end.
- You can manually break out of a repeating group using the icon, which also impacts all subsequent fields.
- Dragging a field or Component row into a repeating group will automatically indent it, and dragging it out will outdent it.
- The above logic also works for nested repeating groups.
ℹ️ Info
Repeating group handling is a complex UI component. If you hit any issues with it, please reach out for help using the chat function.
Defining Functional Views
ℹ️ Create Your Messages First!
Functional views are a powerful concept that is unique to FixSpec and does not exist in the FIX standards. For this reason, we can’t look them up in the FIX Standards, they must be defined locally. So before you create a functional view, it is important to first create the messages that will be used in that view.
- Click the + ADD button where you would like the new view to appear, and then choose Fieldset.
- In the wizard that appears, choose Functional View and search for the Message that it should be based upon.
- We strongly recommend changing the default name of the view, and editing the description (which will be based on the underlying Message).
- Finally, you can use the condition builder to define the condition under which the view should be applied.
- Click SAVE and your view will be added to your specification.
Frequently Asked Questions
We understand that Mermaid is popular for sequence diagrams, and so adding support is in our development backlog.
We prioritised PlantUML, however, because of its rich feature set and robust tooling.
No problem. You can simply add the field as you normally would. If it exists elsewhere in the spec or in your repository, then we will pick up those descriptions. If not, we will simply mark it as a custom field and let you edit it however you need.
The minimum data required to allow conformance to run is the fieldset data (messages, fields and enumerations). For protocols such as FIX, this limited data is also enough to export to QuickFIX. If this is the limit of your goals, then - yes - you can ignore the descriptive sections.
If, however, your goal is to remove duplicate specification maintenance, exporting to PDF or to render on a portal, then the descriptive sections become important.